Page 1 of 9 [ 140 posts ]  Go to page 1, 2, 3, 4, 5 ... 9  Next

Mountain Goat
Veteran
Veteran

Joined: 13 May 2019
Gender: Male
Posts: 14,202
Location: .

03 Feb 2021, 3:26 pm

Here is a project which I started and it is almost finished. (Very little to do to finish it).

I saw a secondhand Faller 4 wheel 0 gauge coach which just looked attractive and my Mum could not afford much so I said to get the coach.

Here it is though I had taken its origional window glass and seats out when I took the photograph as I almost forgot to take a "Before" photograph.

Image

Now I model in narrow gauge so even though this coach is small for 0 gauge, it was still too tall, wide and long for my narrow gauge loading gauge. The only solution is a major disection and reworking and then a re-assembling to form a lower, shorter and narrower coach which will run on a narrow gauge track.


_________________
.


Last edited by Mountain Goat on 03 Feb 2021, 3:41 pm, edited 2 times in total.

Mountain Goat
Veteran
Veteran

Joined: 13 May 2019
Gender: Male
Posts: 14,202
Location: .

03 Feb 2021, 3:40 pm

Now the first job was to dissasemble and to carefully cut the single piecemain part of the body into four seperate sides.

Image

While I was going about making this, I also wanted to make copies of the sides to make a few aditional coaches to the same style but with a different design as the other coaches will have side doors. So one of the origional coach sides was converted to be copied for these other coaches, and a copy was made for this coach so it can have four sides. Here is the new design which has extra plasticard details glued on to represent side doors and smaller windows.

The newly formed sides were made from resin. Playdough was used to cast into as it is a budget way to make molds which are intended for single use. Note the additional details in white.

Image

Note the resin in its "Freshly just poured" condition in the playdough mould.


_________________
.


Mountain Goat
Veteran
Veteran

Joined: 13 May 2019
Gender: Male
Posts: 14,202
Location: .

03 Feb 2021, 3:45 pm

Here are the sides for what will in the future be additional side door entry coaches.

Image


_________________
.


Mountain Goat
Veteran
Veteran

Joined: 13 May 2019
Gender: Male
Posts: 14,202
Location: .

03 Feb 2021, 3:54 pm

Painting commenced as it is easier to paint the insides now before they will be assembled then paint when they have already been assembled.

Image


Here are various scenes where I have painted in bulk with various coaches (Carriages), most have yet to be assembled.

Image

Also can be seen in this second photograph are the end step assemblies which were carefully cut off the origional 0 gauge chassis (See first photograph on this thread).

Image


_________________
.


Last edited by Mountain Goat on 03 Feb 2021, 4:00 pm, edited 1 time in total.

Mountain Goat
Veteran
Veteran

Joined: 13 May 2019
Gender: Male
Posts: 14,202
Location: .

03 Feb 2021, 3:57 pm

A new plasticard frame is made to support the body and its end assembly steps.

Image

Note how the ends of the body and the sides have been reduced in height, width and length as appropiate.


_________________
.


Mountain Goat
Veteran
Veteran

Joined: 13 May 2019
Gender: Male
Posts: 14,202
Location: .

03 Feb 2021, 4:08 pm

Simple bench seats are made from wood and basic assembly continues...

Image


Now the amazing thing is that the beading on the inside of the coach roof just so happened to be the exact size to be used for the outside of the body structure! So I carefully sanded down the roof to the appropiate side! Easy peasy! (Well. Almost!)

Image


_________________
.


Mountain Goat
Veteran
Veteran

Joined: 13 May 2019
Gender: Male
Posts: 14,202
Location: .

03 Feb 2021, 4:16 pm

Now for some passengers...

Image

And work on the underside commences.

Image


_________________
.


Mountain Goat
Veteran
Veteran

Joined: 13 May 2019
Gender: Male
Posts: 14,202
Location: .

03 Feb 2021, 4:19 pm

So here it is as it stands today. The bufferbeams have ben built ready to accept my home made buffers and couplings.

Image


_________________
.


CockneyRebel
Veteran
Veteran

User avatar

Joined: 17 Jul 2004
Age: 49
Gender: Male
Posts: 113,527
Location: Stalag 13

03 Feb 2021, 10:18 pm

It looks like your project is coming along. Thank you for showing me the pictures.


_________________
Who wants to adopt a Sweet Pea?


kitesandtrainsandcats
Veteran
Veteran

User avatar

Joined: 6 May 2016
Age: 60
Gender: Male
Posts: 3,965
Location: Missouri

04 Feb 2021, 5:36 pm

Mountain Goat wrote:
And work on the underside commences.

That brings to mind this posted on the first;
https://www.railpictures.net/photo/761859/


_________________
"There are a thousand things that can happen when you go light a rocket engine, and only one of them is good."
Tom Mueller of SpaceX, in Air and Space, Jan. 2011


Mountain Goat
Veteran
Veteran

Joined: 13 May 2019
Gender: Male
Posts: 14,202
Location: .

04 Feb 2021, 5:39 pm

Yes.

I have not got a ladder. I can make a ladder.


_________________
.


Mountain Goat
Veteran
Veteran

Joined: 13 May 2019
Gender: Male
Posts: 14,202
Location: .

04 Feb 2021, 5:53 pm


_________________
.


Mountain Goat
Veteran
Veteran

Joined: 13 May 2019
Gender: Male
Posts: 14,202
Location: .

06 Feb 2021, 7:49 am

Anyone else like narrow gauge?


_________________
.


kitesandtrainsandcats
Veteran
Veteran

User avatar

Joined: 6 May 2016
Age: 60
Gender: Male
Posts: 3,965
Location: Missouri

06 Feb 2021, 11:40 am

Mountain Goat wrote:
Anyone else like narrow gauge?

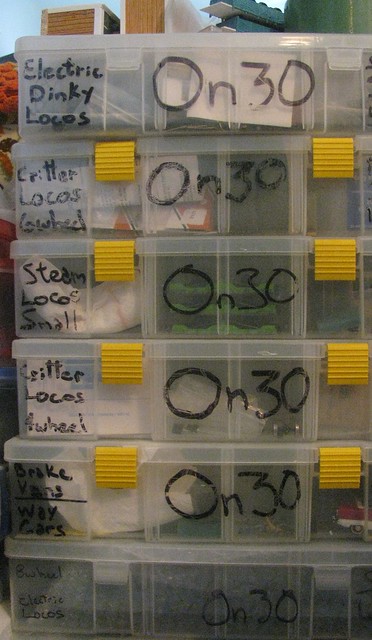
I dunno, man, does the following mean, imply, or insinuate, anything?
:?:
Image


_________________
"There are a thousand things that can happen when you go light a rocket engine, and only one of them is good."
Tom Mueller of SpaceX, in Air and Space, Jan. 2011


Mountain Goat
Veteran
Veteran

Joined: 13 May 2019
Gender: Male
Posts: 14,202
Location: .

06 Feb 2021, 11:59 am

Haha. Maybe! You have a few boxes of stuff there Kitesandtrainsand cats!


Image

Here is my locomotive number 1 "Ruthy" which was made feom a Smallbrook Studio Clio kit which has been modified in various ways, such as a hybrid of a Triang and a Hornby chassis, and additional coal bunkers and weight. It also has home made "Drop loop" couplings and home made name ad number plates.


_________________
.


KT67
Veteran
Veteran

Joined: 6 May 2019
Gender: Female
Posts: 3,807

06 Feb 2021, 12:10 pm

Your trains look great :)


_________________
Not actually a girl
He/him